Cabinet Tools & Equipment: The Definitive Guide
When it comes to DIY projects, building your own cabinets can be a game-changer. Not only does it give your space a personal touch, but it also allows for custom storage solutions that fit your needs perfectly. But before you dive into the sawdust and wood glue, let’s talk about the tools that will turn your cabinet dreams into reality. With the right equipment, you’ll be crafting pieces that are not just functional but also have that professional edge.
Now, don’t let the idea of power tools and fancy equipment intimidate you. I’m here to guide you through the essentials, from the big guns that make the cuts to the tiny details that give your cabinets that polished look. So, let’s get started and turn those planks of wood into your next masterpiece!
Unlocking the Potential of DIY Cabinetry
Imagine walking into your kitchen and seeing cabinets that you’ve designed and built with your own two hands. It’s a feeling of accomplishment that’s hard to beat. But before you can bask in that glory, you need to know what tools will help you achieve it. From saws to sanders, each tool has its place in the cabinet-making process. And remember, the best tool for the job is the one that you can handle safely and confidently.
So, let’s break it down. Whether you’re a seasoned DIYer or a beginner just starting to dabble in woodworking, understanding the role of each tool is crucial. You’ll need tools for cutting, assembling, and finishing your cabinets – each step of the way is important. But don’t worry, I’ll walk you through each one, ensuring you know exactly what to use and when to use it.
- Table Saw: The cornerstone of any woodworking project, perfect for making precise cuts on large pieces of wood.

- Circular Saw: Versatile and portable, it’s great for cutting down larger sheets of plywood.

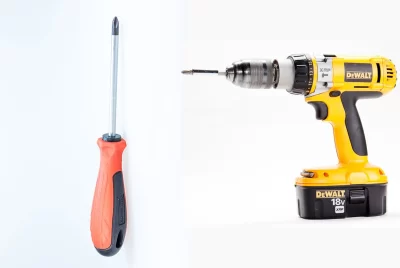
- Drill/Driver: Essential for drilling holes and driving screws, it’s a must-have for assembling your cabinets.

- Sander: To smooth out all those rough edges and surfaces, giving your cabinets a professional finish.

- Measuring Tape and Square: Accuracy is key in cabinet-making, so these tools will become your best friends.


With these tools at your side, you’re well on your way to creating cabinets that are both sturdy and stylish. Remember, the quality of your tools can make a significant difference in the ease and outcome of your project. So, choose wisely and let’s get to work!
Article-at-a-Glance: Essential Insights
Before we dive deeper into the world of cabinet tools and equipment, let’s take a quick snapshot of the key takeaways you’ll gain from this article:
- Understand the essential tools needed for DIY cabinet projects.
- Discover how to select the right tools that will make your work both efficient and enjoyable.
- Learn about cost-effective tool combinations that won’t break the bank.
- Find out how to maximize your budget while still getting quality tools.
- Get tips on power tool safety to ensure a successful and injury-free project.
Keep these insights in mind as we explore the world of cabinet-making tools, and you’ll be crafting like a pro in no time.
Choosing the Right Tools for Cabinet Making
Starting a cabinet project is exciting, but the key to success lies in choosing the right tools. Think of it like going on a treasure hunt – you need the right map and equipment to find the gold. And in this case, the gold is the satisfaction of a job well done.
When selecting tools, consider the type of cabinets you want to build. Are you going for a simple design or something more intricate with unique joinery? This will determine the complexity of the tools you’ll need. Also, think about the space you have available. If you’re working in a small area, look for compact tools that are easy to store.
Lastly, don’t forget about comfort. You’ll be spending a good amount of time with these tools, so make sure they feel right in your hands. A tool that’s too heavy or awkward to use can turn a fun project into a chore. So, take your time and choose tools that you’ll look forward to using.
Criteria for Selection
When you’re standing in the tool aisle, it’s easy to get overwhelmed by the options. To help narrow down your choices, here are some criteria to keep in mind:
- Quality: A well-made tool can last a lifetime, so consider it an investment.
- Functionality: Look for tools that can perform multiple tasks to get more bang for your buck.
- Comfort: If a tool doesn’t feel right in your hand, you won’t use it. Ergonomics is key.
- Reviews: What are other DIYers saying? Their experiences can guide your decisions.
- Price: More expensive doesn’t always mean better. Balance cost with the factors above.
With these criteria in mind, you’ll be able to sift through the noise and find the tools that will serve you best on your cabinet-making journey.
Tool Set Essentials
Let’s talk about the non-negotiables. These are the tools that you just can’t do without when it comes to building cabinets:
- Table Saw: It’s the heart of your workshop. Perfect for making straight cuts and essential for cutting large panels.
- Circular Saw: When you need to make cuts away from the workshop or handle smaller pieces, this is your go-to.
- Drill/Driver: From assembling frames to attaching hardware, a reliable drill/driver is indispensable.
- Sander: Whether it’s a belt sander for large surfaces or an orbital sander for finishing touches, smoothness is crucial.
- Measuring Tools: Precision is what separates a DIY project from professional work. A tape measure and square are essential for accuracy.
Armed with these tools, you’ll have the foundation to tackle any cabinet project that comes your way. Remember, the right tool for the right job will not only make your work easier but also more enjoyable.
Cost-Effective Combos
Building cabinets doesn’t have to drain your wallet. There are smart ways to get the tools you need without spending a fortune. For instance, consider combo kits that include a drill and circular saw. These packages often come at a better price than buying each tool separately.
Another tip is to keep an eye out for sales and discounts at your local hardware store or online. You’d be surprised how often high-quality tools go on sale, making it the perfect time to grab what you need. And don’t forget about second-hand tools – they can be just as effective as brand new ones, especially if they’re from a reputable brand.
So, think of your tool purchases as building blocks. Start with the essentials and add to your collection as you go. That way, you can spread out the cost over time and still enjoy the process of building your dream cabinets.
Budget Stretches and Smart Investments
Stretching your budget doesn’t mean compromising on quality. It’s about making smart choices that give you the most versatility for your money. For example, investing in a high-quality table saw might seem like a big expense upfront, but its versatility will pay off in the long run.
On the other hand, you can save on items like sandpaper and screws by buying them in bulk. These are consumables that you’ll use frequently, so it makes sense to stock up when prices are low. And remember, sometimes the best tool is the one you already have. Before buying anything new, take a look at what’s in your workshop and get creative with how you use it.
Ultimately, building your tool collection is a balance between cost and functionality. By making informed decisions and investing in tools that will last, you’ll set yourself up for success in all your DIY cabinet projects.
Power Tools That Transform Cabinet Crafting
Power tools are the muscle behind any cabinet project. They can take your work from ‘handmade’ to ‘handcrafted masterpiece’. But it’s not just about having power tools; it’s about having the right ones for the job. Whether you’re cutting through thick hardwood or making delicate trims, there’s a power tool out there that can make the task at hand a breeze.
Beginner-Friendly Power Tools
Starting out in the world of power tools can be daunting, but there are some that are perfect for beginners. A jigsaw, for instance, is great for making curved cuts and can be much more forgiving than a table saw. An orbital sander is another beginner-friendly tool that’s easy to handle and can quickly smooth out any rough patches without requiring the finesse of manual sanding.
- Jigsaw: Ideal for cutting curves and shapes in wood.

- Orbital Sander: Perfect for smoothing surfaces without leaving swirl marks.
- Cordless Drill: A versatile tool for drilling holes and driving screws.
- Brad Nailer: For easy and precise attachment of lightweight trim and moldings.


These tools are not only easy to use but also versatile, making them perfect for a wide range of projects beyond cabinet making. So, if you’re just starting out, these are the tools that will give you the confidence to tackle your project head-on.
Advanced Power Tools for Precision Work
As you grow more comfortable with power tools, you’ll start craving that next level of precision and control. That’s where advanced tools come into play. A plunge router, for instance, allows you to make incredibly precise cuts for intricate designs or perfect dadoes for shelf slots. A compound miter saw, on the other hand, is your best friend for making precise angled cuts.
- Plunge Router: For detailed and precise cutouts, edging, and joinery.
- Compound Miter Saw: Essential for accurate angled and beveled cuts.
- Track Saw: Combines the precision of a table saw with the portability of a circular saw.


These tools might require a steeper learning curve, but the investment in time and practice will pay off with results that are nothing short of professional. And as you master these tools, you’ll find that they open up a whole new world of DIY possibilities.
Power Tool Safety and Care
With great power comes great responsibility. Power tools can be dangerous if not used correctly, so always prioritize safety. Read the manuals, understand the do’s and don’ts, and always wear the appropriate safety gear like goggles and ear protection. And let’s not forget about maintenance – keep your tools clean and sharp, and they’ll serve you well for years to come.
- Always read and follow the manufacturer’s safety instructions.
- Wear safety goggles, ear protection, and a dust mask when using power tools.
- Keep blades and bits sharp for better performance and safer operation.
- Regularly check power cords and batteries for damage.
Remember, a well-maintained tool is a safe tool. By taking care of your power tools, you’re not just extending their lifespan; you’re also ensuring that every time you power them up, you can focus on creativity rather than concern.
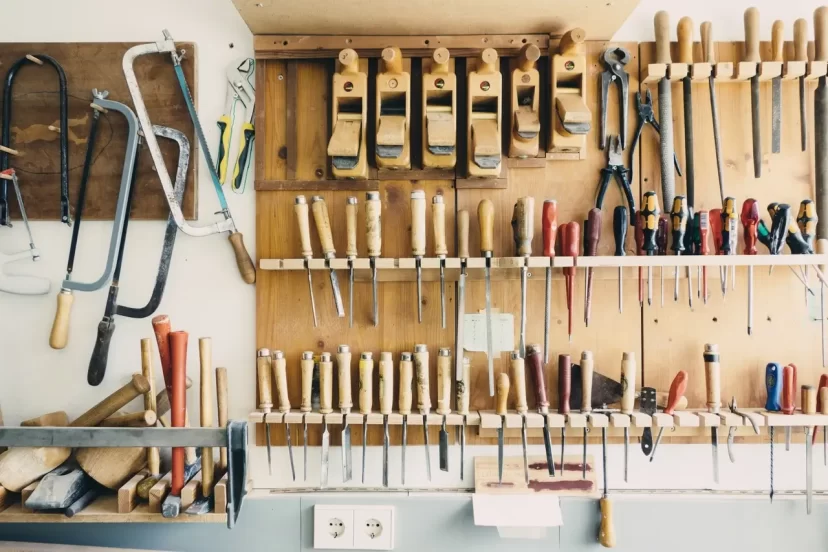
Hand Tools for Fine Detailing in Cabinet Work
While power tools do the heavy lifting, hand tools are where the magic happens. They allow you to add those fine details that elevate your cabinets from good to great. Whether it’s the sharp lines of a well-chiseled joint or the smooth finish of a hand-planed door, hand tools give you the control to add a personal touch to your work.
Accuracy with Chisels, Planes, and Saws
Chisels are the quintessential hand tool for any woodworker. They can clean up joints, pare down wood for a perfect fit, or create intricate designs. Hand planes, on the other hand, are all about smoothness and flatness. They can remove mill marks and prepare wood for finishing better than any sander.
- Chisels: Perfect for cleaning up joints and making adjustments.

- Hand Planes: Ideal for smoothing and flattening surfaces.

- Dovetail Saw: Designed for precise cuts, especially in joinery work.

- Coping Saw: Great for cutting tight curves and complex shapes.


With these hand tools, you can achieve a level of detail and craftsmanship that’s simply not possible with power tools alone. So, take the time to learn these skills, and you’ll be adding a signature touch to your cabinets that’s unmistakably yours.
Carving and Joinery: Essential Hand Tools
For those looking to add an artistic flair to their cabinets, carving tools are your paintbrushes. Gouges, chisels, and carving knives enable you to create designs that are truly unique. And when it comes to joinery, nothing beats the satisfaction of fitting together a dovetail or mortise and tenon joint by hand.
- Gouges: For creating curves and hollows in your carving projects.

- Carving Knives: For detailed and intricate work.

- Marking Gauge: For precise marking of joints and cuts.
- Hand Saw: Sometimes, the simple, controlled cuts of a hand saw are exactly what you need.


These tools require patience and practice, but the rewards are well worth it. The feeling of fitting together two pieces of wood perfectly, without a single nail or screw, is something that never gets old. So, embrace these hand tools, and let them take your cabinet-making to new heights of craftsmanship.
Measuring for Mastery
Let’s cut to the chase: precision is non-negotiable in cabinet making. If your measurements are off, even by a little, doors won’t close properly, drawers will stick, and your entire project can end up looking amateurish. So, it’s crucial to measure twice and cut once – a mantra that should be etched into the mind of every DIY enthusiast.
Tape Measures, Rulers, and More
For starters, a reliable tape measure is your best friend. It’s the tool you’ll reach for more than any other, so find one that’s easy to read and has a sturdy lock. A good ruler comes in handy for smaller, more precise measurements, and don’t overlook the humble combination square – it’s perfect for ensuring your cuts are both straight and square.
- Tape Measure: Essential for quick and accurate measurements.
- Ruler: Ideal for detailed work where precision is key.

- Combination Square: A multifunctional tool for checking the squareness and uniformity of your cuts.
- Level: To make sure your cabinets are perfectly horizontal or vertical.

- Calipers: For when you need to measure thicknesses and diameters with high precision.


Investing in these measuring tools is investing in the success of your project. They’re the foundation upon which all your cutting and assembling is based, so don’t skimp on quality here.
Digital Tools for Perfect Alignment
In the digital age, even the traditional tape measure has received a high-tech makeover. Digital measuring tools can give you readings that are accurate down to the smallest unit, and laser levels can project perfectly straight lines across any surface, eliminating the guesswork and eyeballing.
- Digital Tape Measure: For precise measurements with digital readouts.
- Laser Level: Projects straight lines for leveling and alignment.

- Angle Finder: A digital tool to find exact angles, a lifesaver for mitered cuts.


While these gadgets might seem like overkill to the old-school DIYer, they can significantly speed up your work and improve accuracy. So, if you’re looking to bring a bit of the future into your workshop, these tools are worth considering.
Equipment for the Modern Cabinet Maker
The modern DIYer has access to equipment that would have been unthinkable just a few decades ago. From high-powered machinery to compact, multifunctional devices, the equipment available today can make your workshop feel like a professional cabinet shop.
Technology Integration in DIY Projects
With the advent of smart technology, even tools have become smarter. Imagine a saw that can prevent accidents before they happen or a drill that knows when to stop to prevent stripping a screw. These intelligent tools not only make your work safer but also more efficient.
- Smart Saws: Equipped with safety features to prevent accidents.
- Auto-Stop Drills: Drills that stop before screws are over-tightened.
- Mobile Apps: Many tools now come with apps that help you plan cuts, calculate materials, and even control the tools themselves.
Embracing these advancements doesn’t mean you’re any less of a craftsman. On the contrary, it shows you’re willing to use all available resources to create the best work possible.
Workshop Equipment for Efficient Production
If you’re serious about cabinet making, you might consider investing in equipment that streamlines the process. A dust collection system, for example, keeps your workspace clean and your lungs healthy. An air compressor can power a variety of tools, from nail guns to paint sprayers, making it a versatile addition to any workshop.
- Dust Collection System: A must-have for maintaining a clean and safe workshop.
- Air Compressor: Powers pneumatic tools and cleans dust from hard-to-reach places.
- Workbench: A sturdy workbench is the foundation of any good workshop.
While these pieces of equipment can be an investment, they pay for themselves in the time and effort they save. Plus, they can make the difference between a hobby and a passion that produces professional-grade work.
Space-Saving Solutions for Small Workshops
Not everyone has the luxury of a sprawling workshop, but that shouldn’t stop you from pursuing cabinet making. There are plenty of space-saving solutions that can help you make the most of what you have. Wall-mounted tool organizers, fold-down workbenches, and mobile bases for heavy equipment allow you to maximize your space without compromising on functionality.
- Wall-Mounted Tool Organizers: Keep your tools accessible without taking up floor space.
- Fold-Down Workbench: A full-sized workbench that tucks away when not in use.
- Mobile Bases: Make it easy to move heavy equipment around, freeing up space as needed.
With a little creativity and the right equipment, even the smallest workshop can turn out big projects. So, don’t let space constraints dampen your DIY spirit – rise to the challenge and make your workshop work for you.
Jigs, Fixtures, and Guides
Jigs, fixtures, and guides are the unsung heroes of the DIY world. They might not be as flashy as power tools, but they’re essential for achieving professional results. These clever devices help you make repeatable, accurate cuts, drill holes in the right spots, and ensure that every part of your cabinet is perfectly aligned. In short, they’re your secret weapon for precision.
Purpose and Functionality of Jigs
Jigs are custom-made helpers designed to guide your tools and materials into the exact position needed for a specific task. They ensure consistency and accuracy, which is vital when you’re making multiple cabinets or drawers that need to fit together seamlessly. With jigs, you can cut down on mistakes and wasted materials, saving you time and frustration in the long run.
- Dovetail Jig: For creating strong, beautiful dovetail joints with ease.
- Cabinet Handle Jig: Ensures that your drawer pulls and knobs are placed consistently on every door.
- Shelf Pin Jig: For perfectly aligned shelf pins, making adjustable shelving a breeze.
- Door Hinge Jig: Cuts the guesswork out of installing door hinges.
Investing in the right jigs can elevate your cabinetry work from homemade to handcrafted, and the best part is that many jigs can be made right in your own workshop with just a little bit of ingenuity and some scrap wood.
Using Guides for Perfect Cuts
Guides are another set of tools that are indispensable for precision work. Whether you’re using a circular saw, router, or even a chisel, a good guide can help you make straight, clean cuts every time. They’re like having an extra set of hands that never get tired and always keep things steady.
- Circular Saw Guide: Turns your circular saw into a precision cutting tool for straight, long cuts.
- Router Edge Guide: Helps you make smooth, straight cuts with your router.
- Chisel Honing Guide: Keeps your chisels at the perfect angle for sharp, accurate work.
By using guides, you can achieve a level of accuracy that might otherwise require years of practice. They’re a smart investment for anyone looking to up their DIY game.
Clamps and Clamping Techniques
Ask any woodworker, and they’ll tell you that you can never have too many clamps. Clamps hold your work in place, freeing up your hands to focus on the task at hand. They come in all shapes and sizes, each designed for a specific purpose, and knowing how to use them effectively is a skill in itself.
- Bar Clamps: Ideal for large projects like cabinets, providing a long reach and strong hold.
- Spring Clamps: Quick and easy to use, perfect for holding pieces while glue sets.
- C-Clamps: Great for holding down work on a drill press or securing pieces to your workbench.
- Corner Clamps: A must-have for square assembly, like drawer boxes or cabinet frames.
When clamping, always protect the surface of your wood with a piece of scrap or a soft pad to prevent indentations. And remember, the goal is to apply just enough pressure to hold the work securely without warping or damaging the wood.
Finishing Touches: Hardware and Installation Gear
The final step in any cabinet project is adding the hardware. This is where your cabinets really come to life, and the choices you make can change the entire look and feel of your work. From sleek, modern handles to classic knobs, the hardware is the finishing touch that can make or break your project.
Choosing Hardware: Knobs, Pulls, and Hinges
When it comes to selecting hardware, think about both style and function. The hardware should complement the design of your cabinets and be comfortable to use. It’s also important to consider the finish – you want something that not only looks good but will also stand up to the wear and tear of everyday use.
- Knobs: Simple and classic, they work well on most cabinet doors and drawers.
- Pulls: Offer a more substantial grip, ideal for larger drawers and appliances.
- Hinges: Choose hinges that match the style of your cabinets and provide the functionality you need, like soft-close or full overlay.
Don’t be afraid to mix and match styles or finishes for a custom look. The hardware is the jewelry of your cabinets, so have fun with it!
Installation Kits and How to Use Them
Installing hardware can be tricky, but with the right tools, it’s a breeze. Hardware installation kits come with everything you need to ensure that your knobs and pulls are aligned perfectly and mounted securely. They typically include templates for drilling holes, as well as jigs for positioning the hardware correctly.
To use an installation kit, simply follow these steps:
- Mark the placement of your hardware using the template provided.
- Drill holes at the marked spots, being careful to keep the drill bit straight and level.
- Attach the hardware using the screws that came with it, making sure everything is tight and aligned.
With an installation kit, you can say goodbye to crooked handles and hello to beautifully finished cabinets that look like they were installed by a pro.
Remember, the devil is in the details, and the right hardware installed correctly can make your DIY cabinets look like a million bucks. So take your time, measure twice, and enjoy the satisfaction of a job well done!
Frequently Asked Questions
What Are the Bare Minimum Tools Needed for Cabinet Making?
At the very least, you’ll need a few key tools to start making cabinets. These include:
- A sturdy table saw or circular saw for making clean, straight cuts.
- A reliable drill for assembling the cabinets and attaching hardware.
- A set of screwdrivers for various tasks, including hardware installation.
- A tape measure, square, and pencil for accurate measurements and marking.
- A sander to smooth out rough edges and prepare surfaces for finishing.
With these tools, you can tackle basic cabinet construction and get pretty solid results.
Can You Make Quality Cabinets with Just Hand Tools?
Absolutely! Hand tools have been used for centuries to create stunning furniture. With skill and patience, you can make cabinets that are not only functional but also beautiful. Key hand tools for this job include:
- Hand saws for cutting wood to size.
- Chisels and planes for fine-tuning joints and smoothing surfaces.
- A hammer and nails or a set of clamps for assembly.
- Measuring tools like a ruler, tape measure, and square for accuracy.
While it may take longer than using power tools, the satisfaction of building something with your own hands is unmatched.
What Safety Equipment is Essential for Cabinet Making?
Safety should always be your top priority. Essential safety equipment includes:
- Safety glasses or goggles to protect your eyes from dust and debris.
- Hearing protection, especially when using loud power tools.
- A dust mask or respirator to avoid inhaling sawdust and other particulates.
- Work gloves to protect your hands from splinters and cuts.
- Proper footwear to keep your feet safe from falling objects and sharp tools.
Using this equipment can help prevent accidents and ensure a safe working environment.
How Can I Maximize My Budget When Buying Cabinet Tools?
To get the most out of your budget:
- Buy combo kits that include multiple power tools at a discounted price.
- Look for sales, discounts, and promotions at hardware stores and online retailers.
- Consider purchasing high-quality used tools from reputable sources.
- Invest in multi-purpose tools that can perform various tasks.
- Choose tools that are durable and well-made to avoid the need for frequent replacements.
Remember, investing in the right tools now can save you money in the long run.