How to Use Tile Removal Tools: What You Need To Know
Introduction
If you’re planning to renovate your home or replace old tiles, knowing how to use a tile removal tool can save you time, effort, and even some frustration. As an experienced DIY enthusiast and tile removal advisor, I’m here to guide you through the process of using a tile removal tool effectively and efficiently. Let’s dive in!
Understanding Tile Removal Tools
Before we jump into the practical steps, let’s gain a better understanding of tile removal tools. These tools are designed specifically to help you remove tiles from various surfaces. They come in different types, each with its unique features and benefits.
Types of Tile Removal Tools
- Manual Tile Scrapers: These tools are handheld and rely on physical force to scrape off tiles. They are suitable for smaller areas and delicate tile surfaces.
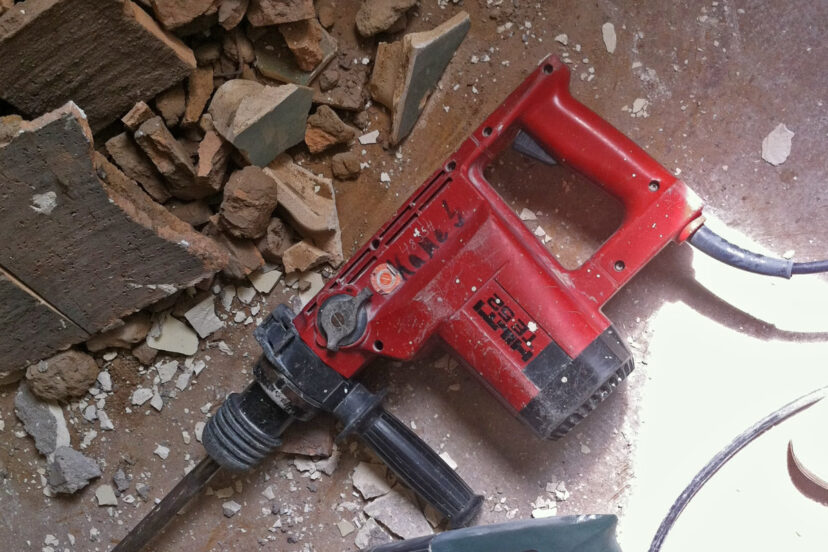
- Pneumatic Chisels: Pneumatic chisels use compressed air to provide more power and speed when removing tiles. They are ideal for larger areas and tougher tile installations.
- Electric Tile Removal Tools: Electric tools, such as electric chisels or tile removal hammers, are powered by electricity. They offer a good balance between power and ease of use.
Benefits of Using a Tool
Using a tile removal tool offers several advantages over manual methods. These include:
- Efficiency: Tile removal tools make the process quicker and more efficient, allowing you to complete your project in less time.
- Precision: With the right tool, you can remove tiles without damaging the underlying surface, ensuring a smooth transition for the new tiles.
- Reduced Physical Strain: By relying on a tool’s power, you can minimize the physical strain on your body, making the tile removal process less tiring.
Preparing for Tile Removal
Before you begin removing tiles, it’s essential to prepare adequately. Taking the following steps will help ensure a safe and successful tile removal process.
Safety Precautions
- Protective Gear: Wear safety goggles, gloves, and a dust mask to shield yourself from flying debris and dust particles.
- Ventilation: Open windows or use fans to provide proper ventilation, especially if you’re working in a confined area.
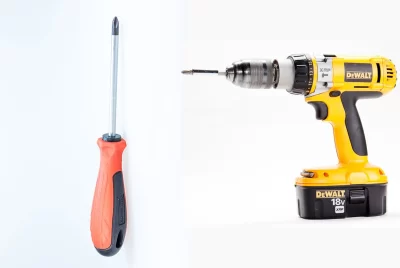
Gathering the Necessary Tools
To start the tile removal process, gather the following tools:
- Tile removal tool of your choice: Based on your project’s size and requirements, select the most suitable tile removal tool.
- Hammer: A hammer will come in handy for removing stubborn tiles or breaking them into smaller pieces.
- Pry bar: Use a pry bar to lift and remove tiles that have been partially loosened.
Using a Tile Removal Tool
Now that you’re prepared, let’s explore the step-by-step process of using a tile removal tool effectively.
Assessing the Tile Surface
Before you begin removing tiles, assess the tile surface to determine the best approach:
- Inspect the tiles: Check for any loose tiles or areas where the adhesive has weakened. These will be easier to remove.
- Identify grout lines: Using a grout saw or utility knife, score the grout lines to help break the bond between tiles.
Starting the Removal Process
- Choose a starting point: Begin at an edge or corner of the tile surface.
- Apply force: Depending on the tool you’re using, apply steady pressure or activate the tool to start removing the tiles.
Removing Tiles Safely
To remove tiles safely, follow these steps:
- Work systematically: Proceed in small sections, focusing on one area at a time. This approach prevents damage to neighboring tiles.
- Angle the tool: Tilt the tool slightly to get underneath the tile, then lift or pry it up gently.
Dealing with Difficult Tiles
Sometimes, certain tiles can be stubborn. Here’s how you can handle them:
- Using a hammer: If a tile doesn’t come off easily, use a hammer to break it into smaller pieces. Be cautious to avoid damaging the underlying surface.
- Using a pry bar: Insert a pry bar under the tile and gently lift it, applying gradual force if needed.
Cleaning Up and Finishing
Once you’ve removed all the tiles, it’s time to clean up and prepare the surface for new tiles:
- Remove any adhesive residue: Scrape off any remaining adhesive using a putty knife or scraper.
- Clean the surface: Use a vacuum or damp cloth to remove dust and debris.
Conclusion
Congratulations! You’ve learned how to use a tile removal tool effectively and efficiently. By following the steps outlined in this article, you’ll be able to tackle your tile removal project with confidence. Remember to prioritize safety, gather the necessary tools, and work systematically to achieve the best results.
Frequently asked questions
Q1. Can I use a manual tile scraper for large tile removal projects?
While manual tile scrapers are suitable for smaller areas, they might not be the most efficient choice for large-scale projects. Consider using pneumatic chisels or electric tile removal tools for quicker and easier removal.
Q2. How do I prevent damaging the underlying surface while removing tiles?
Take your time, use controlled force, and angle the tile removal tool properly. By being gentle and cautious, you can minimize the risk of damaging the surface.
Q3. Is it necessary to wear protective gear during tile removal?
Absolutely! Wearing safety goggles, gloves, and a dust mask is crucial to protect yourself from potential injuries and inhaling dust particles.
Q4. Can I reuse the removed tiles?
It depends on the condition of the tiles after removal. If they are intact and undamaged, you can consider reusing them. However, keep in mind that some tiles may break during the removal process.
Q5. How can I dispose of the removed tiles?
Check with your local waste management regulations for the proper disposal method. Some areas allow placing them in regular construction waste, while others may require specific arrangements for recycling or disposal.
Summary
Are you planning to remove tiles and looking for effective and efficient ways to do it? In this article, I, as an experienced DIY enthusiast and tile removal advisor, will guide you through the process of using a tile removal tool.
The article begins by providing an introduction and explaining the importance of knowing how to use a tile removal tool. It then delves into understanding tile removal tools, discussing the different types available and their respective benefits.
To prepare for tile removal, the article emphasizes safety precautions and the gathering of necessary tools. It highlights the importance of wearing protective gear and ensuring proper ventilation.
The step-by-step process of using a tile removal tool effectively is then outlined. The article covers assessing the tile surface, choosing a starting point, applying force, and removing tiles safely. It also offers tips for dealing with difficult tiles.
After removing the tiles, the article guides you on cleaning up and finishing the surface. It emphasizes removing adhesive residue and thoroughly cleaning the area for the new tile installation.
The conclusion celebrates your newly acquired knowledge of using a tile removal tool and provides a recap of the key points. It emphasizes prioritizing safety, gathering the right tools, and working systematically for successful tile removal.
The article concludes with a section of frequently asked questions (FAQs) that address common concerns about tile removal. These FAQs provide additional information and clarity on specific topics related to the tile removal process.
By following the guidance provided in this article, you can confidently tackle your tile removal project, save time, and achieve excellent results. Remember to prioritize safety, gather the necessary tools, and work systematically throughout the process.