Ultimate Scribe Tool Guide: Tips, Tutorials & Techniques
Key Takeaways:
- Choosing the right scribe tool is essential for a perfect fit.
- Master the foundational scribing techniques to enhance your woodworking.
- Learn how to handle irregular surfaces and complex angles with ease.
- Preparation and protective measures are key to a flawless finish.
- Get professional installation tips to elevate your woodwork.
Scribe Tool Selection

Let’s talk tools. Before you can master the art of scribing, you need to arm yourself with the right equipment. Here’s a rundown:
- Compass: The classic. Great for simple curves and circles.
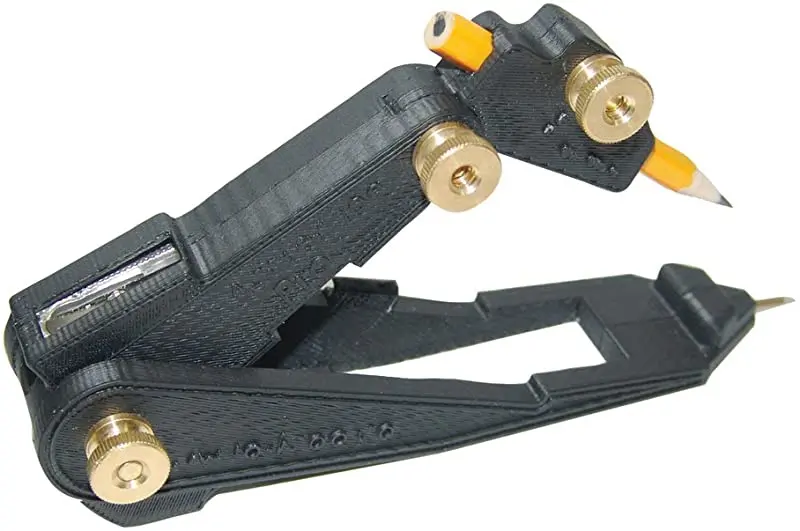
- Thingamejig Scribing Tool: Precision incarnate. Ideal for intricate work.
- FastCap Accuscribe: Versatile and user-friendly. A favorite among pros.
- Simple Scribe: As the name suggests, it’s simple and straightforward.
Choosing the Right Scribe Tool for the Job
Now, let’s get specific. The compass is your go-to for basic tasks. It’s simple and reliable. But when you’re dealing with complex jobs or need absolute precision, the Thingamejig is your best bet. It’s got all the bells and whistles to ensure you’re cutting right where you need to.
Scribed Fit Heroes: Thingamejig, FastCap Accuscribe, and Simple Scribe
These three are the MVPs of scribing tools. Each has its own superpower:
- Thingamejig: Precision. With its micro-adjustment feature, it’s like the sniper rifle of scribing tools.
- FastCap Accuscribe: Flexibility. It can adapt to any surface, making it a jack-of-all-trades.
- Simple Scribe: Accessibility. It’s easy to use, perfect for beginners or quick jobs.
Comparing Scribe Tools for Precision and Ease of Use
When you’re picking a scribe tool, think about the job at hand. For precision, go with the Thingamejig. For ease of use, the Simple Scribe has your back. And for a bit of both, the FastCap Accuscribe is your middle ground.
Foundational Scribing Techniques

Getting the basics down is crucial. Here’s how to start:
- Always hold your scribe tool firmly but not too tight.
- Keep the pencil sharp for clear, precise lines.
- Practice on scrap wood before tackling the real deal.
Baseboard Beautification: Scribing to Perfection
Baseboards can be tricky. They need to hug the wall perfectly. That’s where scribing comes in. You’ll want to use your compass here to trace the wall’s contour onto the baseboard. Then, cut along the line for a snug fit.
Cabinet Panel Customization: Tips for Tight Alignments
Cabinets are the showpiece of any kitchen, so they’ve got to be right. Use a scribing tool like the FastCap Accuscribe to transfer the wall’s unevenness onto the cabinet’s side panel. The result? A cabinet that looks like it was born there.
- Trace the profile of the wall onto the panel.
- Cut carefully, following the scribed line.
- Test fit and adjust as necessary.
Addressing Irregular Surfaces and Complex Angles
Irregular surfaces can be a woodworker’s nightmare. But with the Thingamejig, you can tackle them head-on. Its ability to adjust to any angle makes it the perfect tool for these challenges.
Protective Measures and Prep Work
Before you make your first cut, you need to prep. This means:
- Protecting the surface with painter’s tape.
- Making sure your measurements are spot on.
- Ensuring your scribe tool is set to the correct width.
Remember, the key to a perfect scribe is not just in the cutting, but in the preparation. Take your time to set everything up correctly, and the rest will follow.
Safeguarding Surfaces: Choosing the Best Painter’s Tape
Not all painter’s tapes are created equal. You want one that’s strong enough to hold but won’t leave a residue or damage the surface. Spend a bit more on a quality tape to save yourself a headache later.
Toe Kick and Base Trim Positioning Strategies
Toe kicks and base trims need to be precise. Here’s how to ensure they are:
- Use a level to mark a baseline.
- Position the toe kick or trim against the baseline.
- Scribe the top edge to match the floor’s contour.
Professional Tips for Installation
Installation is where everything comes together. Here’s what the pros do:
- They double-check their scribed lines before cutting.
- They use fine-tooth saws for clean cuts.
- They always test fit before finalizing the installation.
Levelling Techniques for Flawless Cabinet Placement
Cabinets need to be level, or you’ll notice. Trust me. Use shims to adjust the height and ensure everything is perfectly horizontal before you lock it in place.
Custom Cabinetry: Scribing for an Exquisite Finish
Custom cabinetry is all about the details. Scribing is what takes it from good to great. It’s the difference between a cabinet that fits and one that fits perfectly.
Paneling Prowess: Nailing the Fit to Irregular Wall Surfaces
Paneling is an art, and scribing is your paintbrush. When you’re working with irregular walls, your scribe tool is what allows you to create that seamless look.
- Measure the wall’s irregularities.
- Transfer those measurements to your panel.
- Cut and fit until it’s just right.
Ensuring a Smooth and Steady Scribe
Steadiness is key to a good scribe. Here’s how to make sure your hand doesn’t waver:
- Plant your feet firmly on the ground.
- Rest your scribing hand on the workpiece if possible.
- Move the tool, not the material, for better control.
Proper Hand Positioning for Consistent Scribing
Your grip on the scribe tool can make or break your line. Hold the tool like you mean it, but don’t strangle it. A relaxed but firm grip will give you the control you need.
Maintaining Compass Perpendicularity for Accurate Lines
When using a compass, keeping it perpendicular to the surface is crucial. This ensures your scribe line is true to the edge you’re following. A tilted compass can lead to a line that’s off, and that means more work later.
The Woodworker’s Guide to Scribing

Woodworking is a craft where precision meets beauty. Scribing is one of those skills that separates the amateurs from the pros. Here’s what you need to know:
Compass-Based Scribing Essentials for Woodcraft
A compass is not just for drawing circles. It’s a woodworker’s best friend for transferring contours. Here’s how to use it:
- Adjust the compass to the width of the gap you’re filling.
- Keep the pointy leg on the reference edge and the pencil leg on the workpiece.
- Draw your line with confidence and care.
Rasp as a Scribing Companion: The Perfect Finish
After scribing and cutting, a rasp is your finishing touch. It helps you smooth out any rough edges and get that perfect, snug fit. Use it lightly and with precision to refine your work.
Frequently Asked Questions
Q1. What Is Scribing and When Would I Need It?
Scribing is the process of copying and cutting out the profile of one surface to another. It’s essential when you need a perfect fit, like when installing cabinets or baseboards against an uneven wall.
Q2. Can I Use Scribing Tools on Materials Other Than Wood?
Absolutely. While wood is the most common material, scribing tools can be used on plastic laminates, light metals, and even drywall. Just make sure you have the right blade or bit for the material.
Q3. What Are Some Common Mistakes to Avoid When Scribing?
Here are a few pitfalls to steer clear of:
- Not securing your material before scribing.
- Using a dull pencil or blade, which can lead to inaccurate lines.
- Rushing the scribing process. Patience is a virtue in woodworking.
Q4. How Do I Maintain My Scribing Tools?
Keep them clean, keep them sharp, and store them safely. A well-maintained tool is a reliable tool.
Q5. Is There a Way to Practice Scribing Without Wasting Materials?
Practice makes perfect. Use scrap materials to hone your skills. It’s better to make mistakes on something that’s not part of your final project.
And there you have it. With these tips, tutorials, and techniques, you’re well on your way to scribing like a pro. Remember, it’s all about precision, preparation, and patience. Happy woodworking!